here's a simple tutorial on manipulating an existing photograph to suit your tastes.

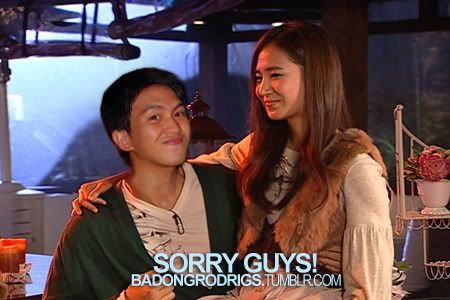
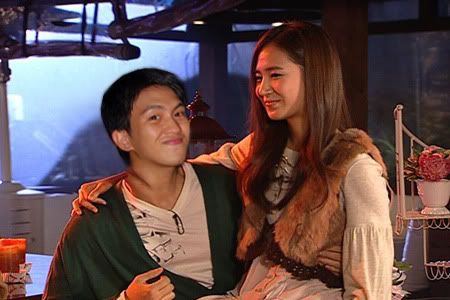
i took the photo below from the internet.
now, i want to replace the guy's face with my own. so open up the ever reliable
Adobe Photoshop CS3. (yes,
Pallas, mine is also a pirated copy. the legit one costs 27,000 bucks. no way.)
so, open the pic in Photoshop.
duplicate the layer (shortcut CTRL+J) so you won't mess up the original photo (PHOTO A). then use either the
Healing Brush Tool (shortcut J) or the
Clone Stamp Tool (shortcut S) to "erase" seamlessly the parts you don't want to appear.
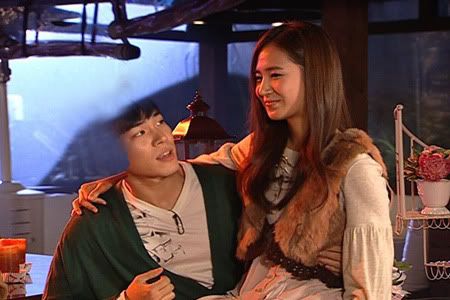
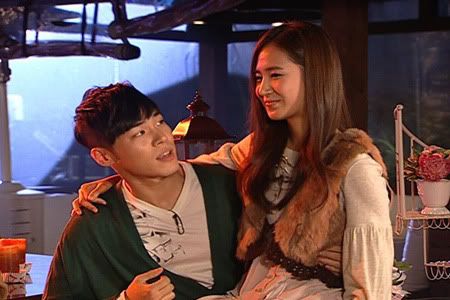
now, import a photo of yourself that more or less can fit into the existing photograph in terms of camera angle. i import my own pic (PHOTO B), then select the unwanted parts via
Polygonal Lasso Tool (shortcut L) then pressing the delete key. i then resize it by using
Free Transform (shortcut CTRL+T) and then dragging to position it over the existing head.
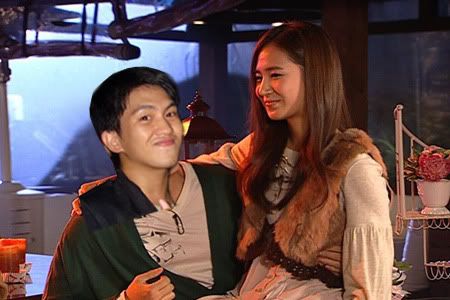
now, do your best to try to relate the PHOTO B to PHOTO A. use the
Adjust Hue/Saturation (shortcut CTRL+U) and adjust PHOTO B. in this instance, i opted to lean PHOTO B towards a more yellow-red-ish Hue, then adjusted the saturation to my taste. i also decreased the levels a bit.
then i eliminated the effect of the camera flash on PHOTO B by using either the
Brush Tool (shortcut B) or the
Clone Stamp Tool (shortcut S). i used proper colors to match PHOTO B. as a result, PHOTO B became a bit over-washed, edited and unnatural. but we shall fix that later.
next thing i did was to mimic the yellow-red-ish spotlights that are flooding PHOTO A, which seems to come from the back of the guy. create a new layer, use the
Brush Tool (shortcut B) with proper colors, and then set the
blending mode of the layer to
SOFT LIGHT, or
OVERLAY. if you have questions regarding that, just say so.

next stop, let's fix the over-washed face of mine.
duplicate PHOTO B (shortcut CTRL+J), set the
layer blending mode to
SOFT LIGHT or
OVERLAY, reduce the
OPACITY of the layer to probably 70 to 80 percent, adjust
Levels (shortcut CTRL+L) and just do your best so that PHOTO B would look alive and one with PHOTO A.
then, slap your caption and watermark on it to OWN IT!