Birthday ko kahapon and i'm feeling bored today so i thought of getting my Graphtech nut and install it on my guitar.
Here's how i did it..
Reference:I used a
PRS SE Standard and a
Graphtech PT-6060-00 BLACK TUSQ XL which is a good replacement with regards to measurements.
Tips:1. Be very careful when choosing a nut, make sure tama sa lahat ng measurements, especially string spacing. ok lang yung may konting allowance na pwede pa isand, per when it comes to string spacing, dapat exact or very close.
2. This task of installing the nut ay relatively kayang gawin ng isang ordinary person. You just need to have a few basic materials that i'll state as we go further.
3. Don't be too hasty sa paggawa. Take it slow.
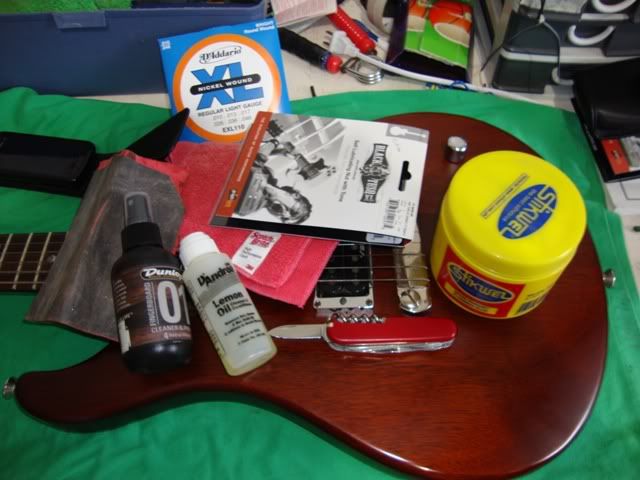
Tutorial:1. Things i used are as follows:
** perhaps you can use Elmer's glue. kelangan mo lang naman mai fix yung nut. the string would also grip it down bigtime. pero i used wood glue kasi wala ako Elmer's.
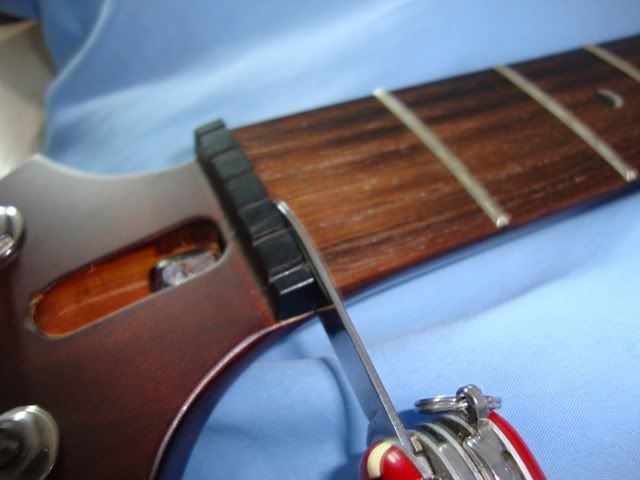
** Something sharp and fine. i found the small knife sa swiss knife ko to be very useful and efficient para dito.
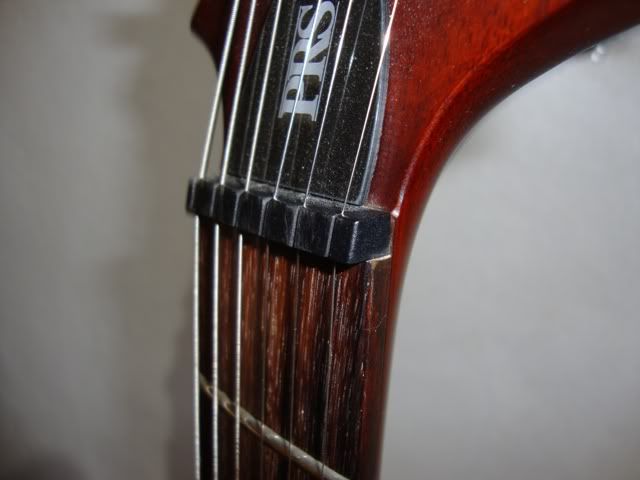
2. Notice how uneven the stock nut was cut? hindi siya sakto sa edges. ewwww.....
3. Remove your strings and let's get it on!!
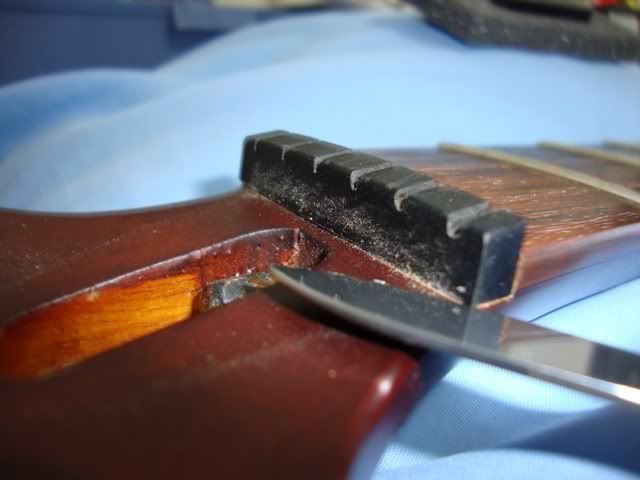
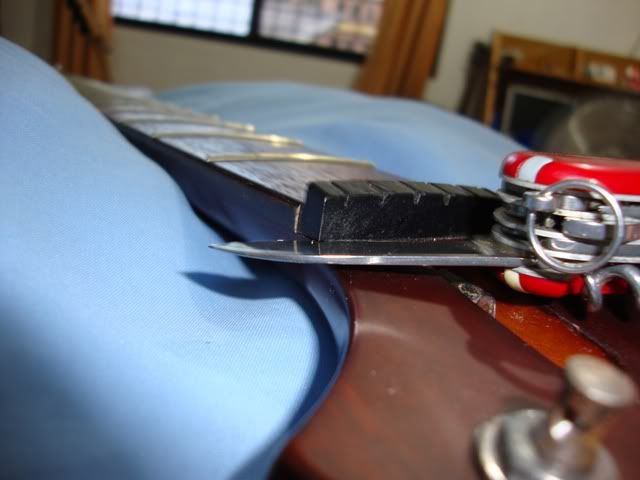
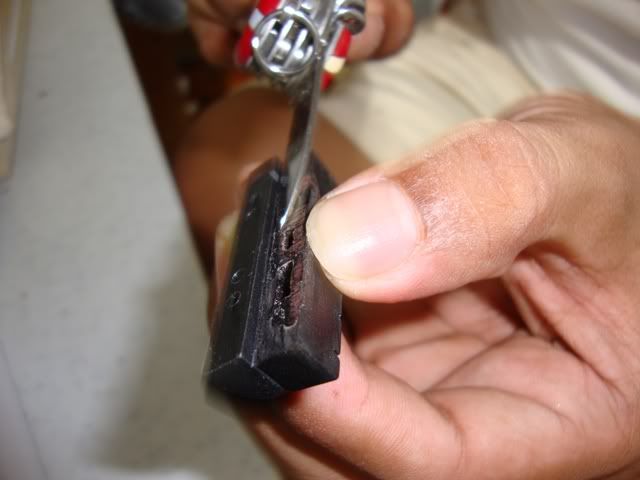
Slowly slice the junction.. avoid slicing the wood.. avoid slicing the stock nut.. what we want is to remove the whole stock nut from being glued.. be very careful.. do it a little sa left at sa right.. and sa taas..
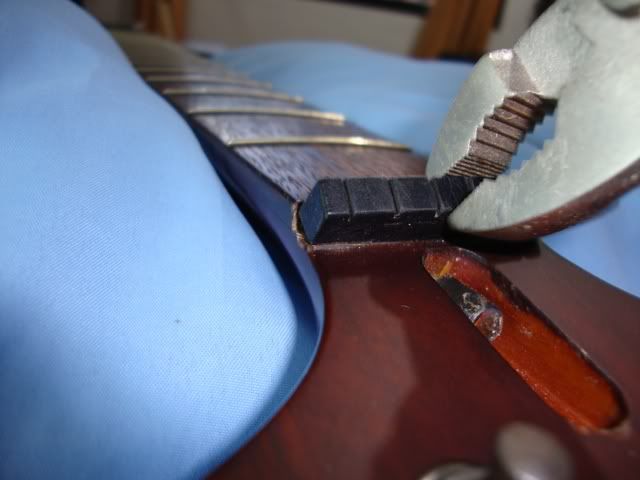
4. Pag feel mo pwede na siya matanggal.. here's what i did.. of course you can opt for another method..
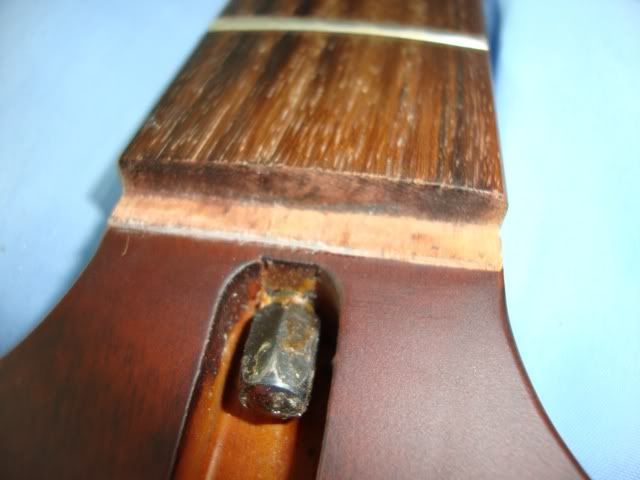
5. Then clean and lightly sand yung pinagtanggalan mo ng nut.. some wood remained pagkatanggal ko so i had to even the nut pocket..
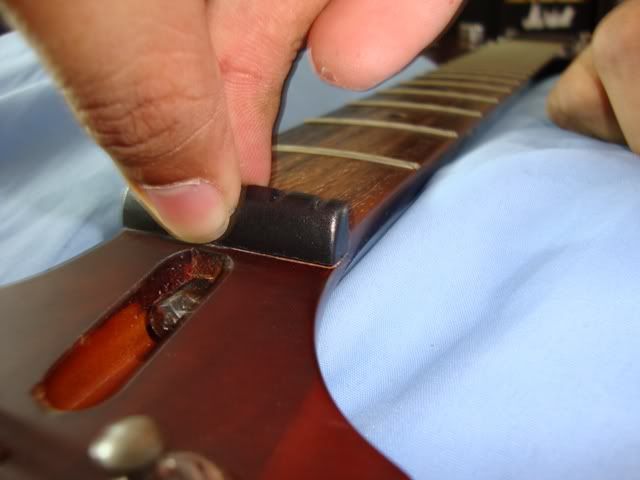
6. Testing the Graphtech PT-6060-00 nut..
7. Comparison of stock (right) and graphtech (left) nut..
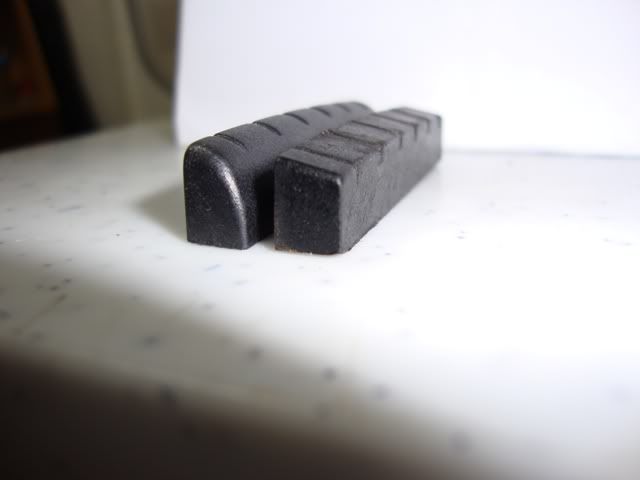
8. I based my measurements sa stock nut.. The graphtech nut seemed to be a direct replacement pero masyado siya mataas so i had to sand/file down the bottom part.. i did a quick mark dun sa graphtech nut para alam ko kung hanggang saan ko isasand and here's how i did the mark..
9. i need not show a photo of the sanding process.. pero first i did was to use a low grade sandpaper para mabilis maubos then a higher grade para dahan dahan nalang at mas pino siya para smooth yung ilalim.. be very careful with this proces.. sayang ang nut pag sumobra ang sand.. but it can be fixed..
10. when you think it's enough, lagay mo sa nut slot.. put the high and low E strings and check kung ok na ang height niya.. don't make it too high, mahihirapang ka dipain yung strings, nor too low kasi baka magbuzz naman.. yung tama lang..
11. pag ok na talaga, put a little glue sa ilalim and fix the nut sa nut pocket.. habang basa pa yung glue, wipe those excess and coming out with a damp towel para malinis.. mahirap matanggal yung mess pag tuyo or semi tuyo na yung glue.. restring your guitar and tune to pitch..
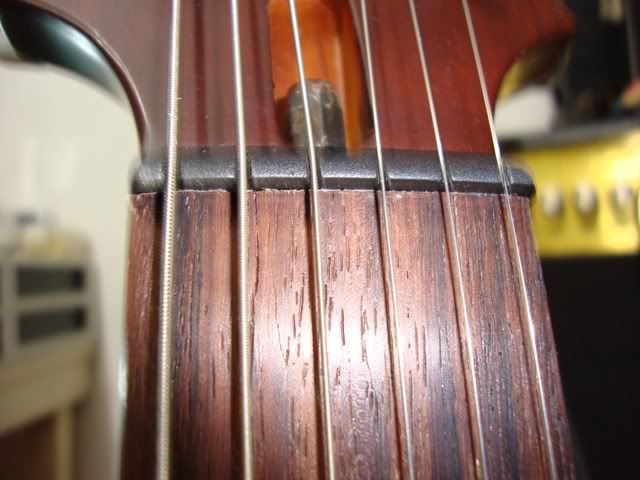
here's mine with the new Graphtech PT-6060-00 nut..
Perfect fit yung particular na model na yung in terms of thickness, string spacing, at width.. height lang ang kelangan isand..
 Comments:
1. it was very easy to tune. i just tuned to pitch then stretched the strings.. and did this twice.. then played the guitar with some major bending and stuff.. then tuned it again to pitch.. SOLVE! konting pagtono lang ok na siya.. no more string binding stuff..
2. i'm yet to see how long this baby stays in tune with this nut.. it definitely solved my tuning issues.. no need for locking tuners.. have i gotten locking tuners, i would have wasted 4000php on a brand new set.. with the graphtec nut, i didn't have to spend more than 1000..
FTW!!
 *** if you have questions on my process.. please don't quote the pictures.. i also refrain others from quoting pictures on this thread.. you can just quote the sentences and numbers.. labelled naman sila kaya madali ma-identify kung san malabo.. this is for the benefit of us all.. para hindi maging masyadong mabagal pag iloload.. this might be a pic heavy thread lalo na sa tutorials..
go lang kayo sa pagpost ng pics ng graphtech upgraded guitars niyo and tutorials.. be kind to others nalang when quoting***

